Step 1. MOVE STUDENTS’ GRADES UP IN THE ATHLETIC SCHEDULER
A) Log in as administrator in AS. Click Edit for ‘Student Eligibility and Info.’
B) Click the ‘Options & Set-Up’ tab then click the Edit for ‘Move Student Up a Grade’ then click ‘Move ALL Students Up a Grade’ button.
Depending on the number of students, this action may take time. Please don’t click twice.
NOTE: If you don’t want to move the grades up yet, you may add text or instructions to your registration form explaining that they need to enter their grades for SY 2022-23. Do not turn the grade field offline so new students can enter their information.
Step 2. CREATE YOUR SY 2023-2024 REGISTRATION FORM
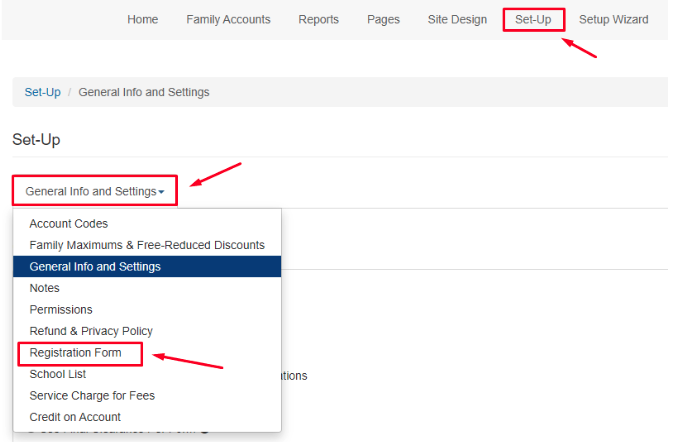
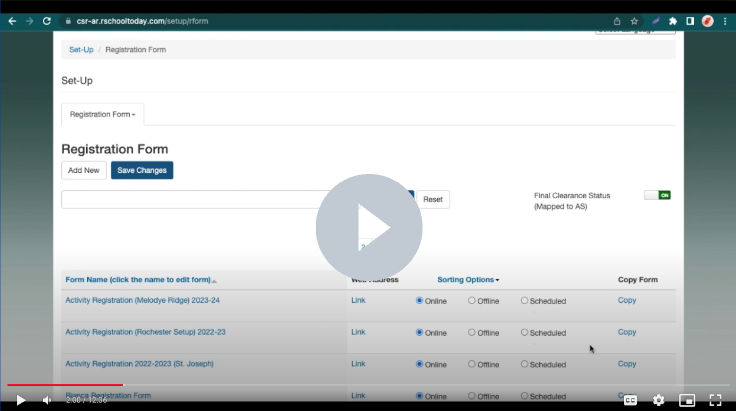
A) Log in as administrator in AR. Click the ‘Set-Up’ tab on the top menu. Click the drop-down arrow and choose ‘Registration Form.’
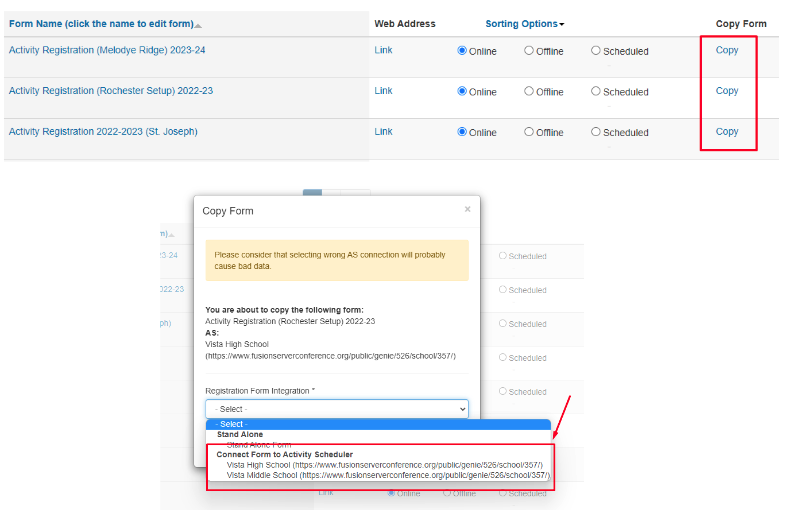
B) On the following web page, click the ‘Copy’ text of your previous registration form. Make sure you connect your form to the correct AS, especially those with different lower levels.
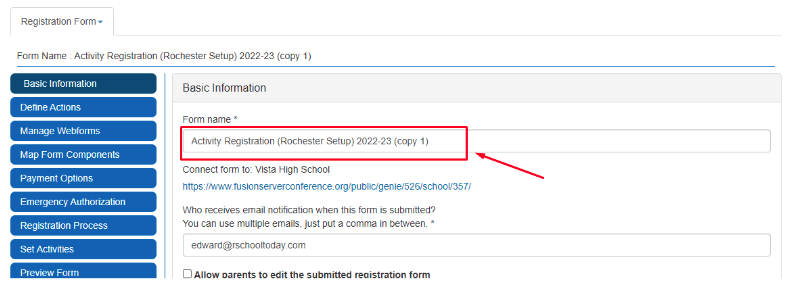
C) Once the form is copied, return to the Registration Form page, select the new form, and change the form’s name to reflect the new school year.
Other Option: You may also use the same registration that you used last year. Just update the form title and the list of sports.
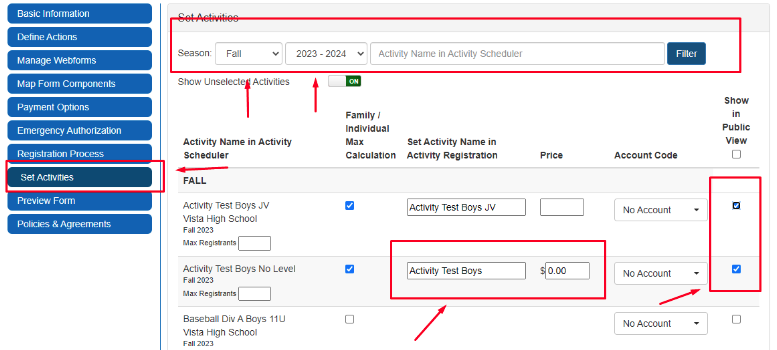
D) To add the new school year activities, go to the ‘Set Activities’ button, select the correct school year and season, and ‘Filter’ the activities. Put a checkmark under ‘Show in Public View’ on the sports/activities you want to make available. Once done, click the ‘Save Settings’ button.
NOTE: If the activity/sport you want to select is not on the list, check if you have a schedule for that activity/sport in your Activity Scheduler (AS) under Team Schedules. You may create a dummy schedule if there is no definite schedule for that activity/sport yet.
Step 3. CREATING A DUMMY SCHEDULE FOR AN ACTIVITY/SPORT ON THE ACTIVITY SCHEDULER WEBSITE
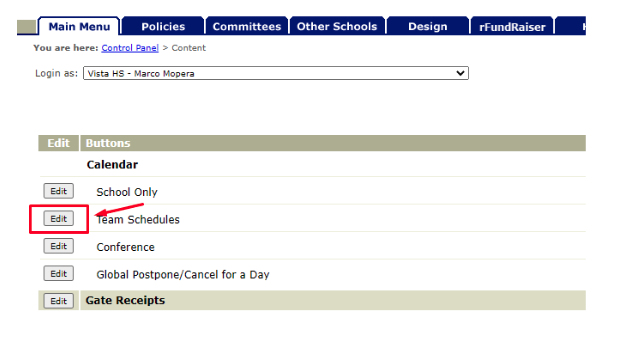
A) Go to the activity scheduler (AS) website and log in as administrator. Click ‘Edit’ for Team Schedules.
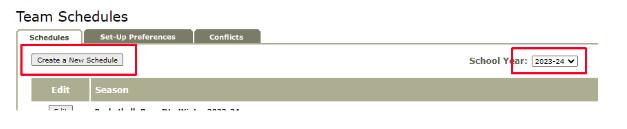
B) On the next page, select the correct school year and click the ‘Create New Schedule’ button.
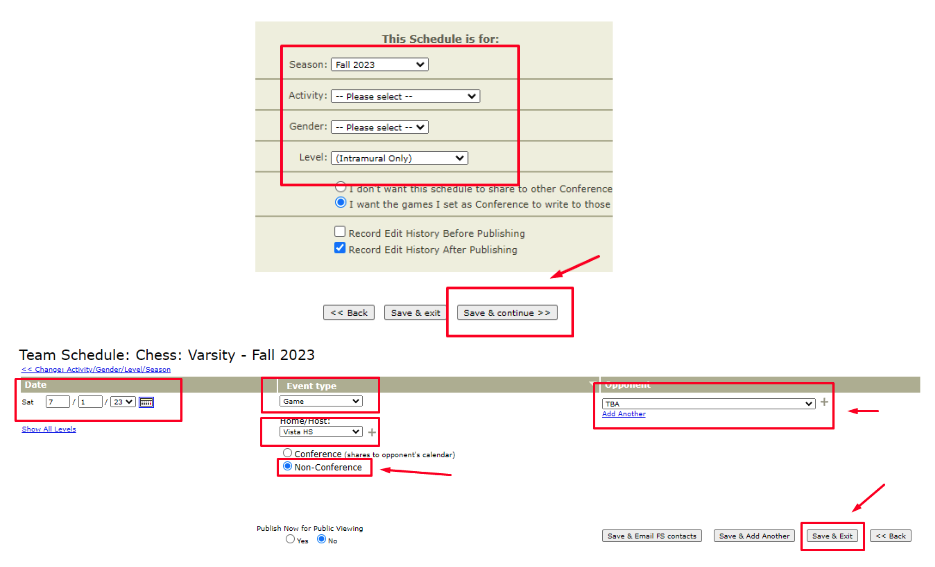
C) On the pop-up selection menu, fill out the correct season/year, activities, gender, and level of the sport/activity. Click the ‘Save & Continue’ button once done.
D) On the next page, enter a mock date for the event if no schedule is available. Add your school as the ‘Home Host’ (you can select ‘TBA’ as the opponent), choose ‘Game’ as the Event Type, and select the ‘Non-Conference’ option. Then, click the ‘Save & Exit’ button.
Note: Once the activity is added, you should see it in the ‘Set Activities’ section of the registration form on the Activity Registration site.
Step 4. UPDATE OR EDIT THE INFORMATION IN THE REGISTRATION FORM FROM SY 2022-23 to 2023-24
A) Click the ‘Manage Webforms’ button on the Registration form setup page to go to the edit page. Select the ‘List View’ button to change the season in the registration form.
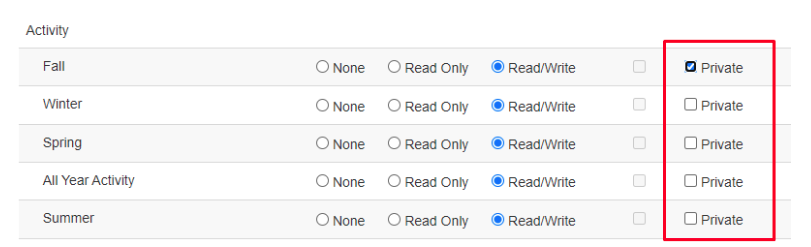
B) Scroll down to the ‘Activity’ category, and set up the seasons you want in your form. A mark on the Private checkbox means that this is hidden from the parent’s view. If you leave the check box empty, the parents can see it on the form.
C) After you finish editing, do not forget to click the ‘Save Changes’ button at the bottom of the page. To preview the registration form, click the ‘Preview Form’ button.
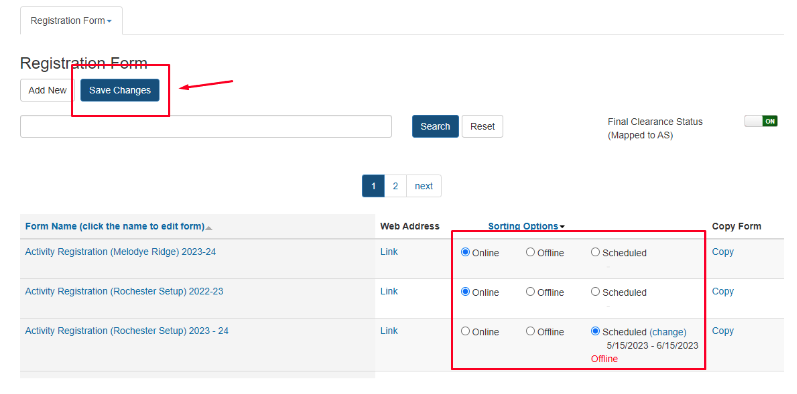
Step 5. PUBLISHING FORMS
A) You can set the ‘Publishing Options’ on the Registration Form setup page. Go to the Setup module and enter the Registration Form to select the Publishing options. The forms set Online will be visible to parents, the Offline forms will be hidden, and the Scheduled ones will be visible only for a specific period. Click on ‘Scheduled’ and then ‘Change’ to select the start and end dates. If you change the publishing options, don’t forget to hit the ‘Save Changes’ button.
Note: Make sure to turn old forms from previous school years ‘Offline’
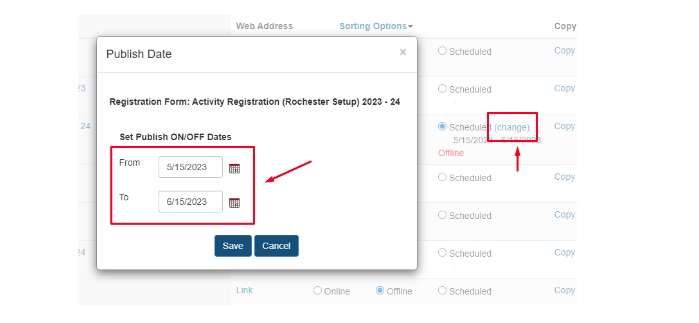
A) When you select the ‘Scheduled’ radio button, a blue ‘change’ link will appear. Clicking on it will generate a small pop-up window where you can set your registration’s start and end date.


 | Policies